
Setup Using HOME 1 (Versions 1.x)
If you have it already installed on your PC then you can check the version. Start up TomTom HOME, then at the very top of the window click on Help and then About TomTom HOME. This open a version information window, if you are using 1.x then this is the right guide.
If your device works with Version 2.x then HOME version 1.x will prompt you to install it, currently it is supported by: GO 520 /720, GO 910/710/510, GO 700/500, ONE 3rd Edition, ONE 2nd Edition, ONE 1st Edition, ONE XL
If you have a different device or have not moved to Version 2 yet then please follow these instructions.
If your device does not support HOME at all (Navigator version before 6 on PDA's) Please email us and we will be able to send you the files to install.
Step 1: Preparation & Checklist
These instructions will work for all recent TomTom devices including TomTom GO: 3 series, 5 series, 7 series, 9 series. TomTom Rider, Mobile, One, One XL, Navigator and PDA (version 6 and above).
Checklist of software and equipment needed:
- A PC running windows (ideally XP or Vista)
- TomTom device (fully charged or running from mains adapter)
- USB cable for connecting a TomTom to the PC
- The HGV Services & Fuels DOWNLOAD or CD ROM
Also required is an up to date version of TomTom HOME installed on the PC. These instruction are for HOME Version 1.x, with 1.5 being the latest version. This can be downloaded from here DOWNLOAD HOME or use the link on the nav-bar.
TomTom HOME is a software program that runs on the PC and enables the user to carry out important activities. This includes installing Places Of Interest (POI) onto the TomTom. To check the version you have start up TomTom HOME - at the very top of the window click on Help and then About TomTom HOME. This open a version information window, version 1.5 or higher is required. If you have 2 or above then see the top of this page.
With TomTom HOME installed on the PC, connect the TomTom to the PC with the USB cable and then turn on the TomTom. TomTom HOME will detect that a TomTom has been plugged in and start automatically. If it doesn't start then it must be started manually. In windows click Start - All Programs - TomTom - then click TomTom HOME to open the program.
Initially make a full backup of the TomTom using the "Make Backup" option in the left window of TomTom HOME. Any problems encountered later on can be solved by restoring the TomTom.
If the TomTom hasn't been connected to TomTom HOME before then its likely a number of system messages will appear. These prompt you to update the TomTom software and other components. Updating the TomTom software is recommended so you can take advantage of the new features and keep the device up to date.
With TomTom HOME installed, the TomTom device software up to date and a full backup taken, then installation of the POIs can begin.
Step 2: Configuring TomTom HOME
Connect the TomTom to the PC, start TomTom HOME and then locate the Explore
button in the left hand window and click on it
![]()
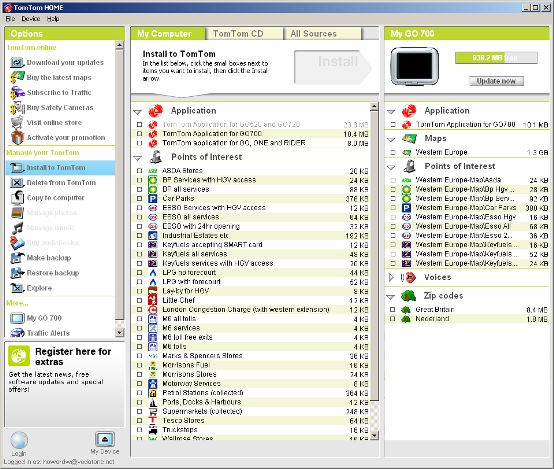
the screen will show three vertical windows with the TomTom model type listed in the top right corner. This shows the device is connected (see the example below)
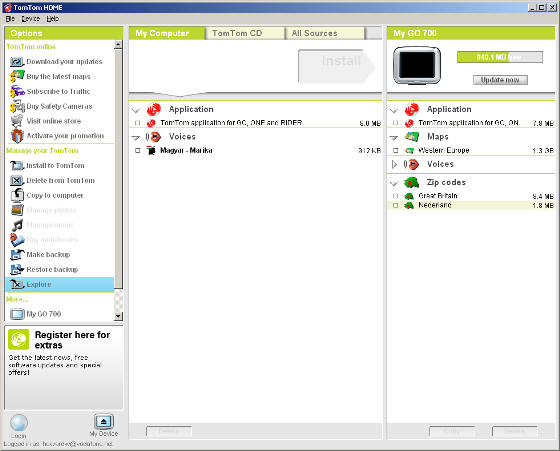
the three windows in TomTom HOME are:
- The left window is for housekeeping, downloads, making backups and buying online products
- The middle window displays what is stored on the PC, including Points Of Interest, voices, maps, applications etc
- The right window shows what is actually installed on the TomTom, including Points Of Interest, voices, maps, applications etc
If POIs have been previously installed either using TomTom HOME or by the older method (manually copying files over) then these "Points of Interest" will already appear in the right window.
Click the File menu in the top left corner of TomTom HOME and select Preferences...
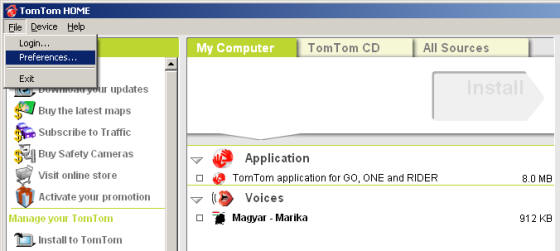
The Preferences window will open, it has two "tabs", one called General and the other Advanced
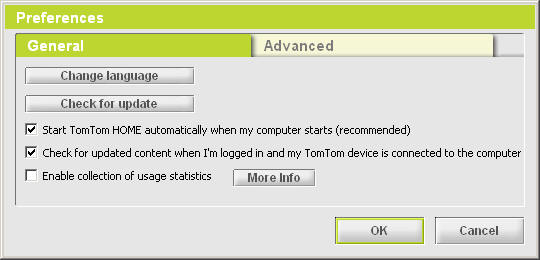
Click Advanced to swap tabs (see below)
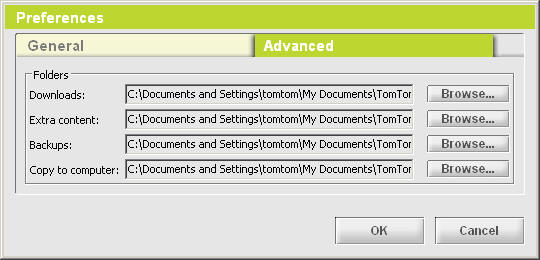
The file location setting for Extra content: needs to be changed so that it refers to the data files in the DOWNLOAD or CD ROM. Click the Browse button directly to the right of the Extra content: line and a standard Browse For Folder window will open
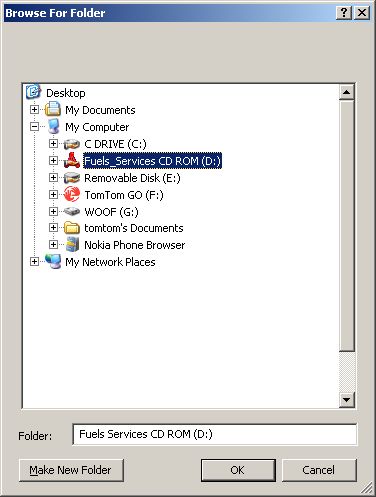
If you are installing from the CD ROM then select the CD ROM from the browse window as shown above. click on the Fuels_Services CD ROM and its name will also appear in the Folder: line as above. Then click OK.
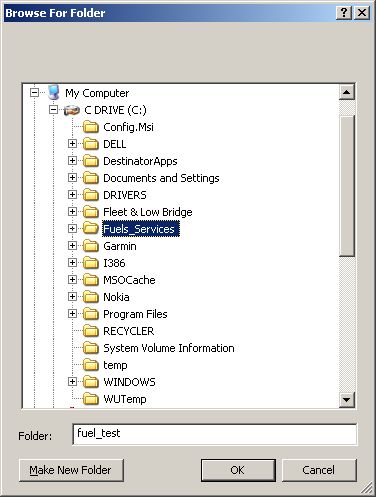
If however you are using the DOWNLOAD then you need to locate the directory that you extracted from the DOWNLOAD. This will be on your C: drive at the top level unless you have moved it, it is also the same place that you opened the MENU from to read these instructions. click on the directory and it will appear in the folder: window as above. Then click OK.
If you have trouble finding these locations you can use the + sign next to an item to expand its contents and the - to shrink it. If My Computer is not already expanded (like the example above) cjust lick on the + sign to its left. This will display all the devices on the PC; hard drives, folders, DVD's, CD ROM's etc.
You will return to the Preferences Window and the Advanced "tab". The file location beside Extra content: should now have changed and reflect the adjustment you made. Below we show the example for the DOWNLOAD but if you are using the CD ROM this would also be reflected here.
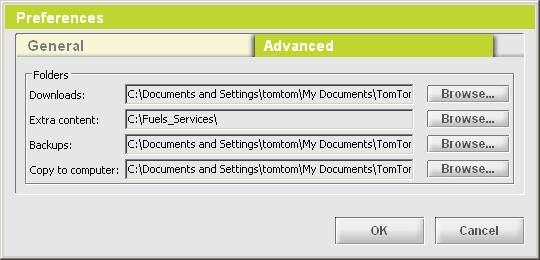
click the OK button to return back to the main TomTom HOME window. The POI categories on the CD ROM will now appear in the middle window listed under "Points of Interest".
Step 3: Installing POIs with TomTom HOME
 icon
on the left of HOME and selecting the ones to remove. This will make
installing the new ones much easier as you wont get confused by out of data
data.
icon
on the left of HOME and selecting the ones to remove. This will make
installing the new ones much easier as you wont get confused by out of data
data.Underneath the Points of Interest label in the middle window will be a long list of the POI categories from the DOWNLOAD or CD ROM. If only the words "Points Of Interest" appear then try clicking on the label so that the grey arrow changes from the right
![]()
to pointing down which will expand the POI category list
![]()
a screen similar to that below should be seen

any POI categories already installed using TomTom HOME will also appear in this list as it shows all the POI categories that are available.
The new POI categories from the DOWNLOAD or CD ROM are shown with their icons next to them. To install them is very simple just click on the small empty box to the left of the POI category to select it for install.
So here we have ESSO with HGV access turning from blank

to being filled in with grey when selected

repeat this for all the POI categories you want to put on your TomTom. Any left blank will be ignored, and can be installed at a later date.
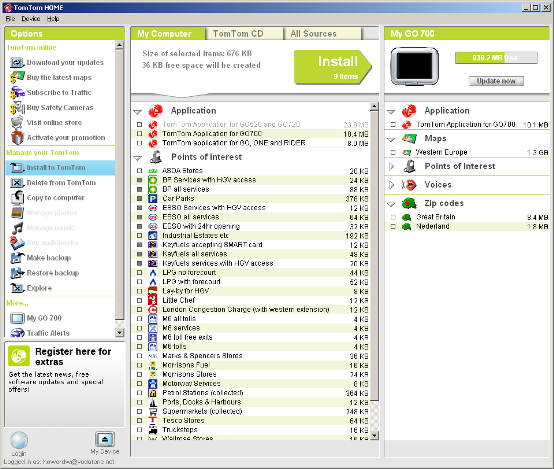
The example above shows nine POI categories select for installing. The TomTom window on the right doesn't show any Points Of Interest yet because none have been installed.
Click the Green Install Button at the top of the screen to start the install process. The number of POI categories selected for installing are shown inside the button (in this example 9 items)

the install progress window appears as the POIs are being installed

once finished the newly installed POI categories appear listed in the right window underneath the Points of Interest label as shown below
The icons for these POI categories are displayed along with their location on the TomTom. Close down TomTom HOME, turn off the TomTom and then disconnect it from the PC.
Step 4: Checking the POIs are installed
To check the POI categories are active and installed properly turn on the TomTom and wait for the start-up screen. If you made a number of updates or installed lots of POI categories then it may take slightly longer than normal for the TomTom to start.
the standard "driving" screen will shortly appear similar to the example below
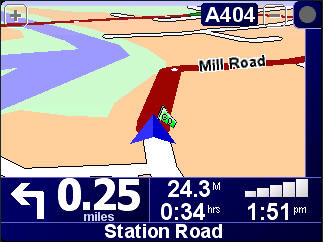
click on the middle of the screen to get into the menu options
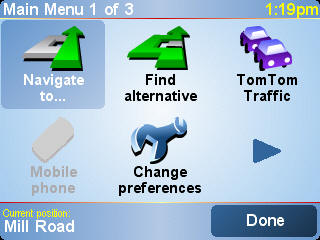
Select the Change preferences icon

select the Enable/disable POIs icon or the Show POI on map option (depending on software version)
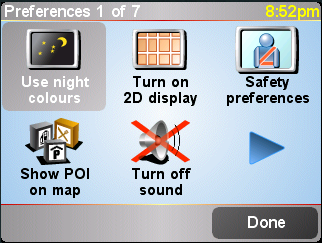
A screen like the one above will appear with a list of POI categories and a tick next to any that are turned on. If the POI categories you selected for install are in the list then you installed them successfully.
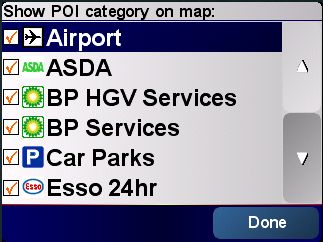
Make sure that each POI category you want to use has a tick next to it. Congratulations you have installed the HGV Fuels & Services Data Pack.
Step 5: Planning a route using a POI
From the preferences screen (see Step 4:) select the Navigate to... icon

select Point of Interest icon from the menu
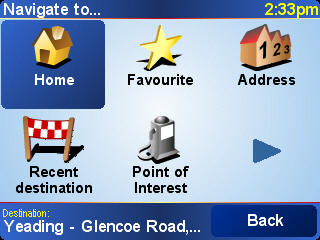
The screen below has a number of options that help locate relevant POIs. The example chosen will use a Morrison's Supermarket . Click POI near you
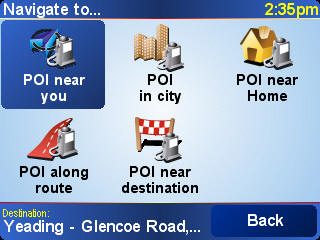
a shortcut screen of recently used POI categories is displayed, this helps
locate often used POI categories. The new POI categories have not yet been used
and so won't show up as shortcuts yet. Click the grey arrow
pointing to the right
![]() to move onto a complete POI category list.
to move onto a complete POI category list.
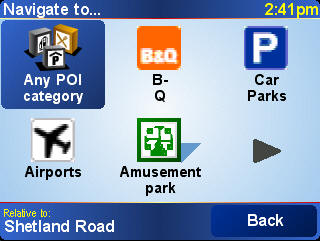
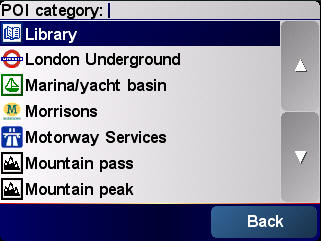
use the up and down arrows to move through POI category list and locate the Morrison's Supermarket POI category
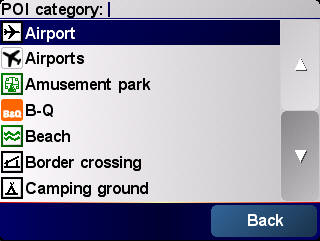
scroll down to the Morrison's category and then click to select it
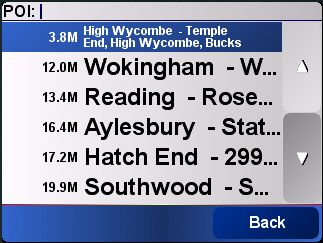
the next screen shows the actual Points Of Interest within the Morrison's category. Within the POI category is a list of all Morrison stores shown by distance from the current location. Click on any chosen entry to select it, at any time you make a mistake you can use the Back button.
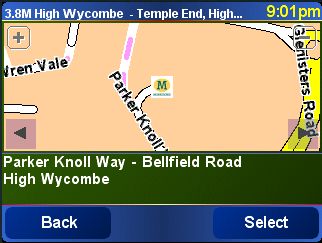
Depending on your software version you will get a highlight screen or you will just go to the next step. On the highlight you can check that this is the location that you want or look through more of them.
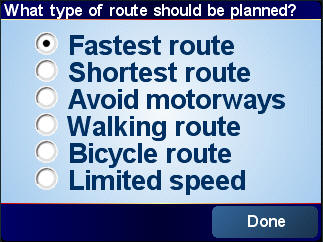
the next window is the route type choice. For this example click Fastest route which is the default choice and then click Done
the TomTom device calculates a route and presents an overview map and route summary.
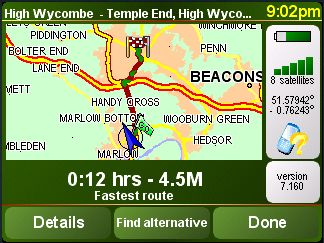
Click the Done button and the "driving screen" will reappear with a route planned to your chosen Morrison's, ready for the journey.
Congratulations you have now planned a route to one of the new Places Of Interest that you installed from the DOWNLOAD or CD ROM. You will find that using these accurate and complete POI categories will really enhance your sat-nav driving experience.
Summary
The run through of the installation and setup of POI using TomTom HOME is now complete.
If you require more help using POI categories or other aspects of your TomTom we suggest you refer to the TomTom device manual or contact the TomTom support desk.
For specific help or guidance on installing HGVSOLUTIONS POI categories, initially refer to the Troubleshooting Manual a very useful source of assistance. Alternatively contact our dedicated support team via the helpdesk - both resources can be found through the nav-bar at the top left of the page.
UPDATES
We provide frequent updates for this pack as it alters more often than Low Bridges. We will provide you with a reminder email, but should you not have had an update or reminder just contact us and we will assist.
Please don't forget to register yourself for support and updates - REGISTER
Licence Terms & Copyright click here: Licence & Copyright